Why and when to disinfect an artesian well?
Well disinfection is essential for any new well and for wells that have just been restored following a repair or contamination, for example.
Required equipment: bleach or chlorine, garden hose
Estimated time: between 12 and 24 hours, depending on your well’s flow rate
Before starting well disinfection
First, you need to know the total depth and diameter of the well. As a general rule, artesian wells for residential use have a diameter of 6 inches (150 mm).
Get a 3.6-liter (1 gallon) container of standard bleach (use bleach without additives or fragrance) for every 100 feet (30 meters) of depth of your 6-inch well. For example, for a well 200 feet deep, you will need 2 gallons of bleach. Liquid chlorine can also be used. In this case, add ½ gallon (2 liters) of chlorine per 100 feet of well.
Important note: If you have a water treatment system such as a filter or softener, you will need to bypass it, as the chlorine or bleach added to the well could damage this equipment.
After well disinfection
It is important not to consume the water until you have completed a bacteriological analysis that confirms its potability. This analysis should be done at least 2 weeks after well purging and with normal water usage. If the analysis is performed too quickly after disinfection, the results will be inaccurate.
If the second water analysis confirms that the water is not potable, Experteau will be able to offer you a safe and permanent treatment solution.
Contact us to speak with one of our water treatment experts.
Well disinfection steps
- Turn off power to the well pump.
- Open the well cover.
- Set aside the electrical connection located under the cover.
- Pour the appropriate amount of liquid chlorine or bleach into the well.
- Restart the pump by restoring its power supply.
- Take a garden hose from the house or directly from the pressure tank and bring the end of the hose back into the well.
- Turn on the water and let it run into the well.
- Let the water run into the well for at least 30 minutes or until a chlorine (or bleach) odor is noticeable at the end of the hose. The purpose of this step is to recirculate the disinfectant in the well to ensure a homogeneous and effective mixture. Do not worry about draining your well or running out of water — it is the same water recirculating in a closed loop!
If after one hour you do not smell chlorine, you may need to add more*. In this case, add one 3.6-liter container at a time and wait 30 minutes before reassessing the chlorine odor. - Then turn off the garden hose, remove it from the well, and close the well cover.
- Theoretically, a waiting period of 30 to 60 minutes would be sufficient to disinfect bacteria in your well. In practice, for better efficiency, we recommend not using your water for 12 hours so the disinfectant can complete its reaction.
- At this stage, you can also disinfect your entire household plumbing (cold water only) by opening each faucet indoors and outdoors until you smell chlorine, then closing it immediately.
- After 12 hours, purge the well to remove residual chlorine (bleach). The purge procedure depends on the well flow rate:
i. Flow greater than 300 gallons/hour (19 L/min): water can run continuously until purge is complete.
ii. Flow between 100 and 300 gallons/hour (6.3–19 L/min): run water for 30 minutes followed by a 4-hour stop, then repeat.
iii. Flow less than 100 gallons/hour (6.3 L/min): run water for 30 minutes followed by a 12-hour stop. - The purge must be done using a garden hose connected to an outdoor faucet. Continue until the water is clear, free of residue, discoloration, and chlorine odor. If the water is colored at the beginning, this is a normal reaction between chlorine and minerals.
- Once the purge is complete, restart your water treatment system (filter and/or softener) and use the water normally. If you disinfected your plumbing, run cold water from each faucet until clear — a few minutes should be sufficient.
*Water chlorine demand.
This corresponds to the difference between the amount of chlorine (bleach) added and the measurable chlorine residue after reacting with elements in the water. The suggested quantity is only a basic indicator for simple calculation. Understanding chlorine demand helps ensure effective disinfection throughout the process. The objective, after step 8, is to reach a minimum free chlorine level of 1.5 mg/L (1.5 ppm). A pool chlorine test kit can be used to validate residual chlorine levels.
Contact us to speak with one of our water treatment experts.
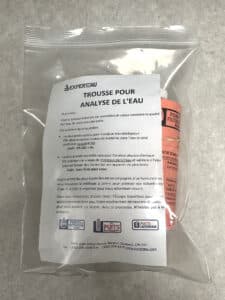
WATER ANALYSIS KIT
Here is the analysis kit that will help you better understand the quality of your new well water.
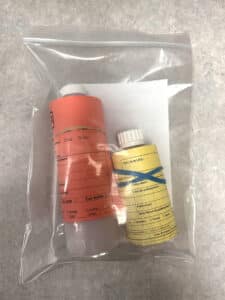
It contains two bottles.
- The smaller one is used for microbiological analysis. It determines the level of bacteria in the water and confirms potability. Cost: $99.95 + tax;
- The larger bottle is for physico-chemical analysis. It specifies mineral levels and determines whether the water could leave stains on plumbing fixtures. Cost: Free for you.
The smaller bottle includes a form explaining the sampling method and the timeframe for submitting your samples.